.webp?width=120&height=85&name=Relentless-Digital%20(1).webp)
⚠️ IMPORTANT: Complete this process in a single, uninterrupted session. If you pause or stop, you may have to restart from the beginning. Please set aside at least 30 minutes to finish the entire process. Before starting, ensure you have the following:
- Your CP 575 Form (also known as your EIN confirmation letter)
- A desktop computer with a video camera (or a smartphone)
- A valid government-issued ID (e.g., passport, driver’s license, etc.)
- Access to Bullseye Pro
- Access to your email inbox
How to Access BEP Trust Center
1. Log into Bullseye Pro via Desktop (recommended) or Mobile App (iOS)
Note: You should have received an email invitation to log into Bullseye Pro in which you would have set up your password.
If you are having difficulties remembering the password you set, go to the login page https://app.bullseyepro.ai/ and hit the "Forgot Password?" text then input your email address to receive a password reset request email. Be sure to check your spam folder.
2. Click on Settings > Phone numbers > Trust Center.


3. Click on Start Registering Now

4. Select "Yes" to the location and tax ID question, following the screenshots below:

 After you have answered the questions, click "Continue" button.
Section 1 - Business Details
1. Enter your Legal Business Name

IMPORTANT NOTE: You must enter the legal business name EXACTLY as it appears on your CP 575 form from the IRS. Please note that your full legal business name may span multiple lines on your CP 575 / 147c letter. If that is the case, you must input all the text in the lines above the address line (which constitutes your full legal business name) instead of just using the first line. The legal name has to be provided for official verification but your full legal name does not need to be used in the SMS campaigns. Campaign SMS messaging and any branding efforts can still display your preferred company name as appropriate.
The system will check the accuracy of the legal business name provided against a Global Verification Database that the IRS updates within 45 days after a new business registration. As DBA/FBNs are typically filed with the local Secretary of State, and these agencies do not update the records in the Global Verification Database, therefore it’s extremely important you do not mistakenly provide a DBA/FBN as your legal name in this section.
Incorrect formatting of your legal business name here can lead to verification issues and significant delays, so be sure to check the formatting before submission!
❓What is the CP 575 form?
This is the letter you received when your EIN (Employer Identification Number) was first issued. It’s sometimes referred to as the “EIN Confirmation Letter.”
If you don’t have a copy of your CP 575 form on hand, you can request a replacement by calling the IRS Business & Specialty Tax Line at 800-829-4933. When you call:
1. Choose the option for EIN assistance.2. Verify your identity and business details.
3. Ask them to fax or mail you a copy of the 147C letter, which is the IRS’s replacement for the CP 575.
2. Use the dropdown to select the type for your business.

3. Select the appropriate option that applies to your business registration type.

4. Input your business registration number, In case of US, EIN must be a 9 digit number. E.g. 12-3456789.

5. Select the industry you operate in.

6. Type your business email in this field.

7. Enter your website URL here.

8. Select the region/s you do business. Click "Continue" once done.

9. Business Address - Enter the business address that is shown on the CP 575.

10. Input street address. Ensure the street address you have entered here is linked to your business.

11. Here you are required to enter the name of the city for the business address you just entered in the previous step. Make sure the city name you enter is exactly the name that appears on your tax listing.

12. Enter the zip code for your business address.

13. Click Continue to proceed.

14. Fill in the contact info for yourself as the Authorized Representative-

15 In this field, you are required to select the most applicable job title for yourself as the authorized representative.

16. Click "Continue" to proceed.
Email OTP (One Time Passcode) Requirement
After the submission of your contact info under the Authorized representatives section, you may get a pop up saying your email address needs to be verified.
1. Click on "Send OTP" button, then check your email inbox, spam, or junk folder to find the code. 
2. Copy and paste the OTP verification code into the pop up box. 
If needed, use the “Resend OTP” option after a 60-second cooldown, with a maximum of two resends allowed. Upon successful verification, the registration flow will proceed. If verification fails, follow on-screen instructions or if you’re experiencing issues or have questions about the A2P registration process, contact your Onboarding Specialist.
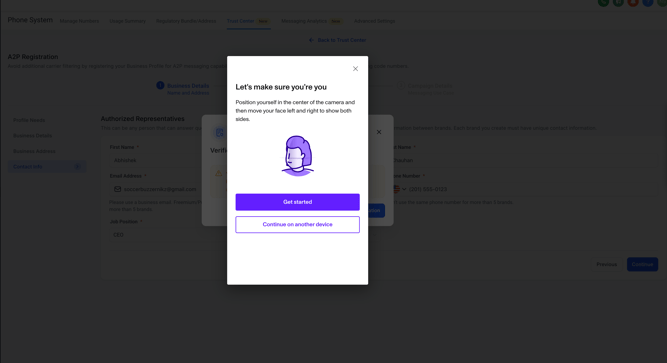
Potential Identification Verification Requirement
Occasionally the registration system may require an additional identification verification be completed. You cannot go back and change the contact info to someone else in the middle of your submission, you will need to perform the ID verification to move on to the next section of A2P 10DLC registration. Additionally all Sole Proprietor business types are required to submit to this additional ID verification by default.
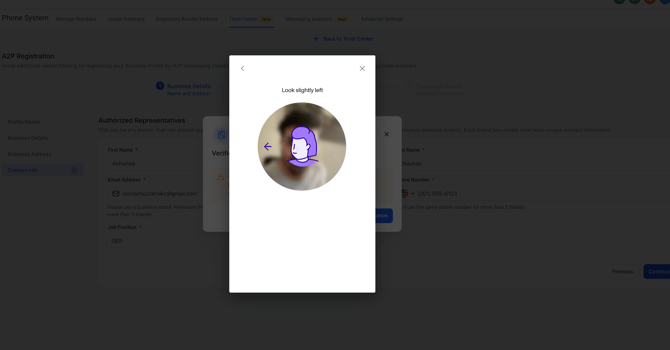
Please follow the prompts as they show. You will need do to this process on a computer with a video camera OR select “Continue on another device” to get a QR code you can scan on your smart phone with a camera.
You will be required to upload a capture of a valid government-issued ID (e.g., passport, driver's license, etc.) then provide a live selfie with simple head movements to confirm you identity against the ID provided.
Section 2 - Brand Details
1. Business Use Case
Check the box to give consent for the registration charges and fees.

NOTE: Since this action is done in a sub-account under Relentless Digital's control, we will be billed for the brand and campaign registration. This will not require you to input any billing or payment details.
Click "Continue" to proceed ahead.

That completes the steps to submitting a standard brand. The next step is the campaign submission.
Section 3 - Campaign Details
In this section, you will need to state the objective of your promotional outbound SMS campaigns. We will supply the precise language required—simply copy and paste the provided text into the appropriate field during submission. Please note: any text enclosed in double braces should be entered exactly as shown and does not require customization prior to submission.
1. For Campaign Use Case, leave selected on "Low Volume Mixed"
2. For Use Case Description copy & paste the following:
This campaign sends appointment information - confirmation & reminder messages to customers once they have booked an appointment with on website and opted-in to receive promotional and notification SMS from .
3. For Sample Message #1 copy & paste the following:
Hello, this is Rachel from . I am following up with you about our meeting yesterday, would you have time to discuss this today? Reply STOP to unsubscribe.
4. Sample Message #2 Sample Message #1 copy & paste the following:
Hello, this is Rachel. We are confirming your appointment tomorrow at 9 am. Reply STOP to unsubscribe.
5. Check the top 2 boxes for "The message will include an embedded link" and "The message will include phone numbers", this should be selected by default in the process. 
6. Hit Continue.
7. Under How do lead/contacts consent to receive messages copy & paste the following:
End users opt-in by sending START to
8. Under Opt In Message copy & paste the following text block:
End users opt-in by visiting INSERT-WEBSITE-URL and filling in their details. Users check a box to receive notifications & promotional messages to provide their consent. Additionally end users can also text START to
9. In the pasted text field for Opt In Message, please replace the INSERT-WEBSITE-URL text with your actual website domain url. This is the only custom field you DO need to replace.
10. Once done, click "Submit" button.
🎊 Congrats! you have completed the A2P registration process. Relentless Digital will monitor for approval and re-submit if needed for any reason.